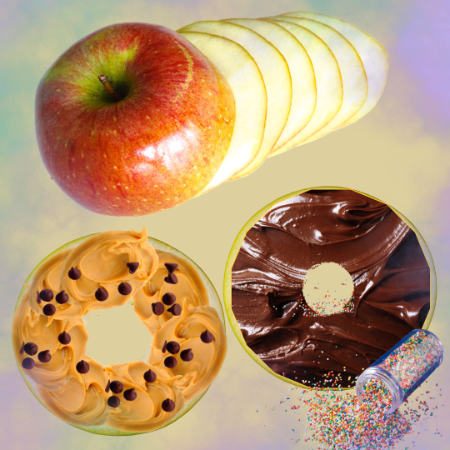
Embarking on a culinary journey with your little ones can be a delightful and educational experience. Today, we have a simple yet scrumptious recipe that will not only engage your child’s senses but also provide a healthy twist to a classic treat – Peanut Butter Cocoa Apple Donuts!
Step 1: Sing a Song Together While Washing Hands.

Kick off your culinary adventure by turning a simple task into a fun and educational experience. While washing hands, sing a lively song together. Not only does this make handwashing enjoyable, but it also reinforces good hygiene habits. Choose a favorite tune or create a handwashing song – the options are endless. This playful ritual sets the stage for a positive and engaging cooking session.
Step 2: Gather Ingredients and Tools
Assemble the ingredients and tools needed for this exciting kitchen adventure. Make it a collaborative effort, allowing your child to feel involved in the preparation process.
Ingredients and Tools:
- Apples
- Lemon juice (1 tablespoon)
- Peanut butter (1/4 cup)
- Cocoa powder (1/2 tablespoon)
- Toppings of your choice
- Mini cookie cutter
- Water (1 cup)
- Tools such as a bowl, plate, etc. are shown on the downloadable recipe, both in words and pictures, so your child can ‘read’ the recipe All By Myself!

Step 3: Adult Assistance for Apple Preparation
While your child takes charge of Step 2, adult assistance is required to cut the apples into 1/2-inch rounds. For the donut hole, either assist using a mini cookie cutter or pre-cut out the center of each apple slice.
Step 4: Soak Apple Slices
Create a mixture of 1 cup of water and 1 tablespoon of lemon juice, and let the apple slices soak for 5-10 minutes. This not only adds a zesty flavor but also prevents the apples from browning. After soaking, pat the slices dry.
Step 5: Peanut Butter Cocoa Magic
Mix 1/4 cup peanut butter with 1/2 tablespoon cocoa to create a delicious spread. Encourage your child to take charge of this step, promoting a sense of independence in the kitchen. Spread the peanut butter cocoa mixture onto each apple slice. As an option, use plain peanut butter or a tree nut alternative.

Step 6: Add a Splash of Color and Texture with Toppings
This is where the real fun begins! Allow your child to unleash their creativity by adding toppings of their choice. Sprinkles, chopped nuts, or even a drizzle of honey can add a personal touch to these delightful apple donuts. This step not only enhances the visual appeal of the donuts but also allows your child to explore various colors and textures, making the experience both fun and educational.
Here are some more fantastic topping options to choose from:
- Rainbow Sprinkles: Let the colors of the rainbow brighten up your donuts. Sprinkle them generously over the peanut butter cocoa mixture to add a playful and vibrant touch.
- Mini Chocolate Chips: For chocolate lovers, mini chocolate chips are a perfect choice. The melty goodness combines with the creamy peanut butter, creating a heavenly flavor combination.
- Granola: Add a crunchy element to your apple donuts with a sprinkle of granola. It not only enhances the texture but also brings a wholesome and nutritious aspect to the treat.
- Mini-Marshmallows: Add mini-marshmallows to transform your donuts into a miniature campfire treat. Watch them toast slightly under the broiler for a gooey and delightful twist.
- Chopped Nuts or Seeds: Elevate the nutritional value of your donuts by incorporating chopped nuts or seeds. The added crunch and flavor make for a satisfying bite, whether almonds, walnuts, or sunflower seeds.
Encourage your child to name the various colors and textures as they prepare, making this step an engaging and educational experience. This is their chance to express themselves and make each donut uniquely theirs!
Step 7: Plate the Apple Donuts
Place the finished apple donuts on a plate, arranging them in an inviting display. This step is not only about presentation but also allows your child to take pride in their culinary creation.
Step 8: Enjoy!
Finally, savor the fruits of your labor! Let your child revel in the joy of not only creating a delicious treat but also expressing their individuality through the choice of toppings. This step is not just about eating; it’s about celebrating the joy of cooking together and making lasting memories in the kitchen.
Adult Jobs:
- Help ‘read’ the recipe.
- Allow the child to do as much as possible independently.
- If using a cutting tool instead of a mini cookie cutter, assist in cutting out the center of each slice.
- Encourage the child to name sprinkle colors as they prepare, adding a fun and educational aspect to the activity.
While the recipe is designed for children to explore their culinary skills and boost self-esteem, adult assistance is crucial for certain tasks. From singing a song together during handwashing to helping with apple preparation, adults play a supportive role, ensuring a safe and enjoyable cooking experience.
This recipe not only provides a tasty treat but also involves children in the kitchen, fostering independence and creativity.


